

This post may contain affiliate links. If you use these links to purchase something I may earn a small commission at no cost to you. You can read my full disclaimer here.
When you pay attention to light have you ever had a WTF moment when you realize that the background lighting is perfect, but your subject is too dark? Or when you change your settings to correct your subject and realize that the background is now too light? Yep, I’ve been there.
For the best photos, lighting is everything, regardless of whether it is natural or not.
What is the Best Way to Handle Lighting?
There is no one size fits all solution. How you handle lighting depends on what you are trying to achieve, the location of the light (especially natural light) and where your subject is posed. There are many ways to correct lighting – below you will see a few basic tips.
1. One of the primary tips you will hear from Photographers is to avoid mid-day and aim to shoot at dusk or dawn – but what if you don’t have the choice?
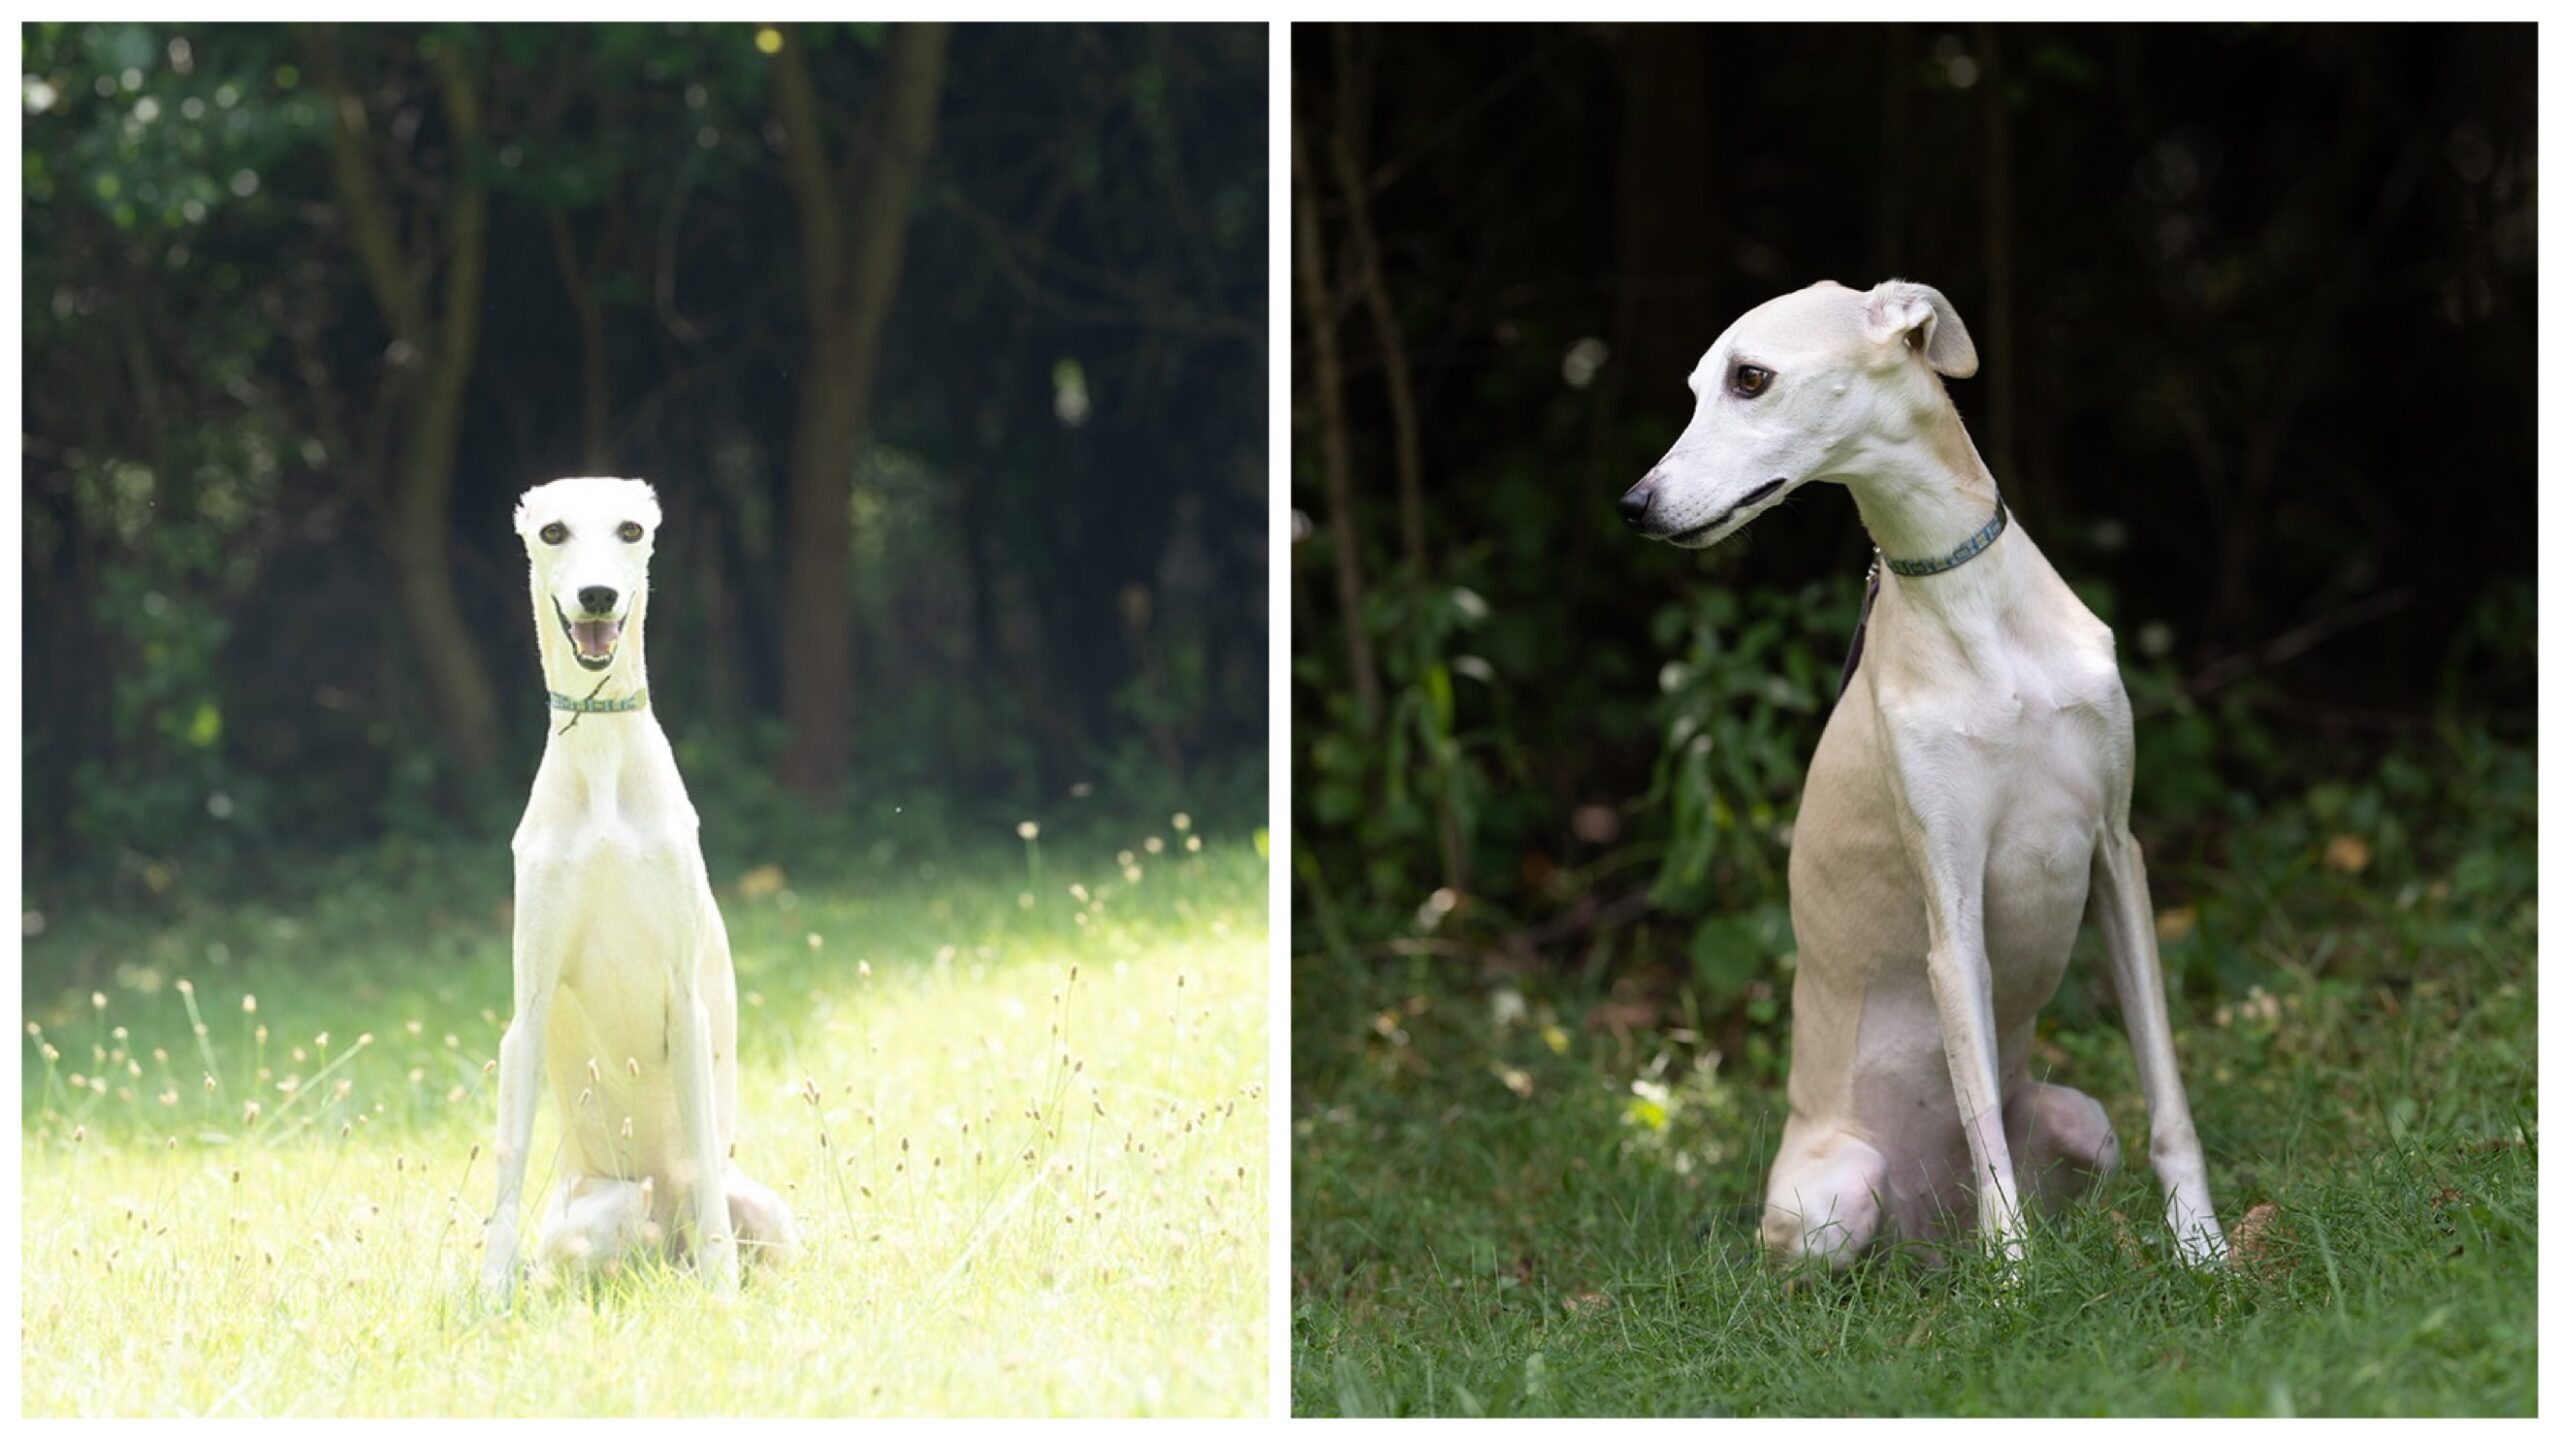
Remember One Tip at a Time Tip one where I showed you the difference in the pics of Maizie taken with the same camera? That is a good example of one way to change the lighting – take your subject out of the bright sunlight and place them in the shade.
See what a difference that made in the below comparison? It is the same background, I just backed her up a bit into the shade.
2. Shoot at Dusk or Dawn
Shooting at Dusk or Dawn avoids the bright sunlight that you see in example 1.
But shooting at dusk or dawn lighting can still have its hiccups. You still need to ensure that the light source is pointing at your subject in the correct way. If the primary focus of your subject is too dark, you may need them to point more toward the light source.
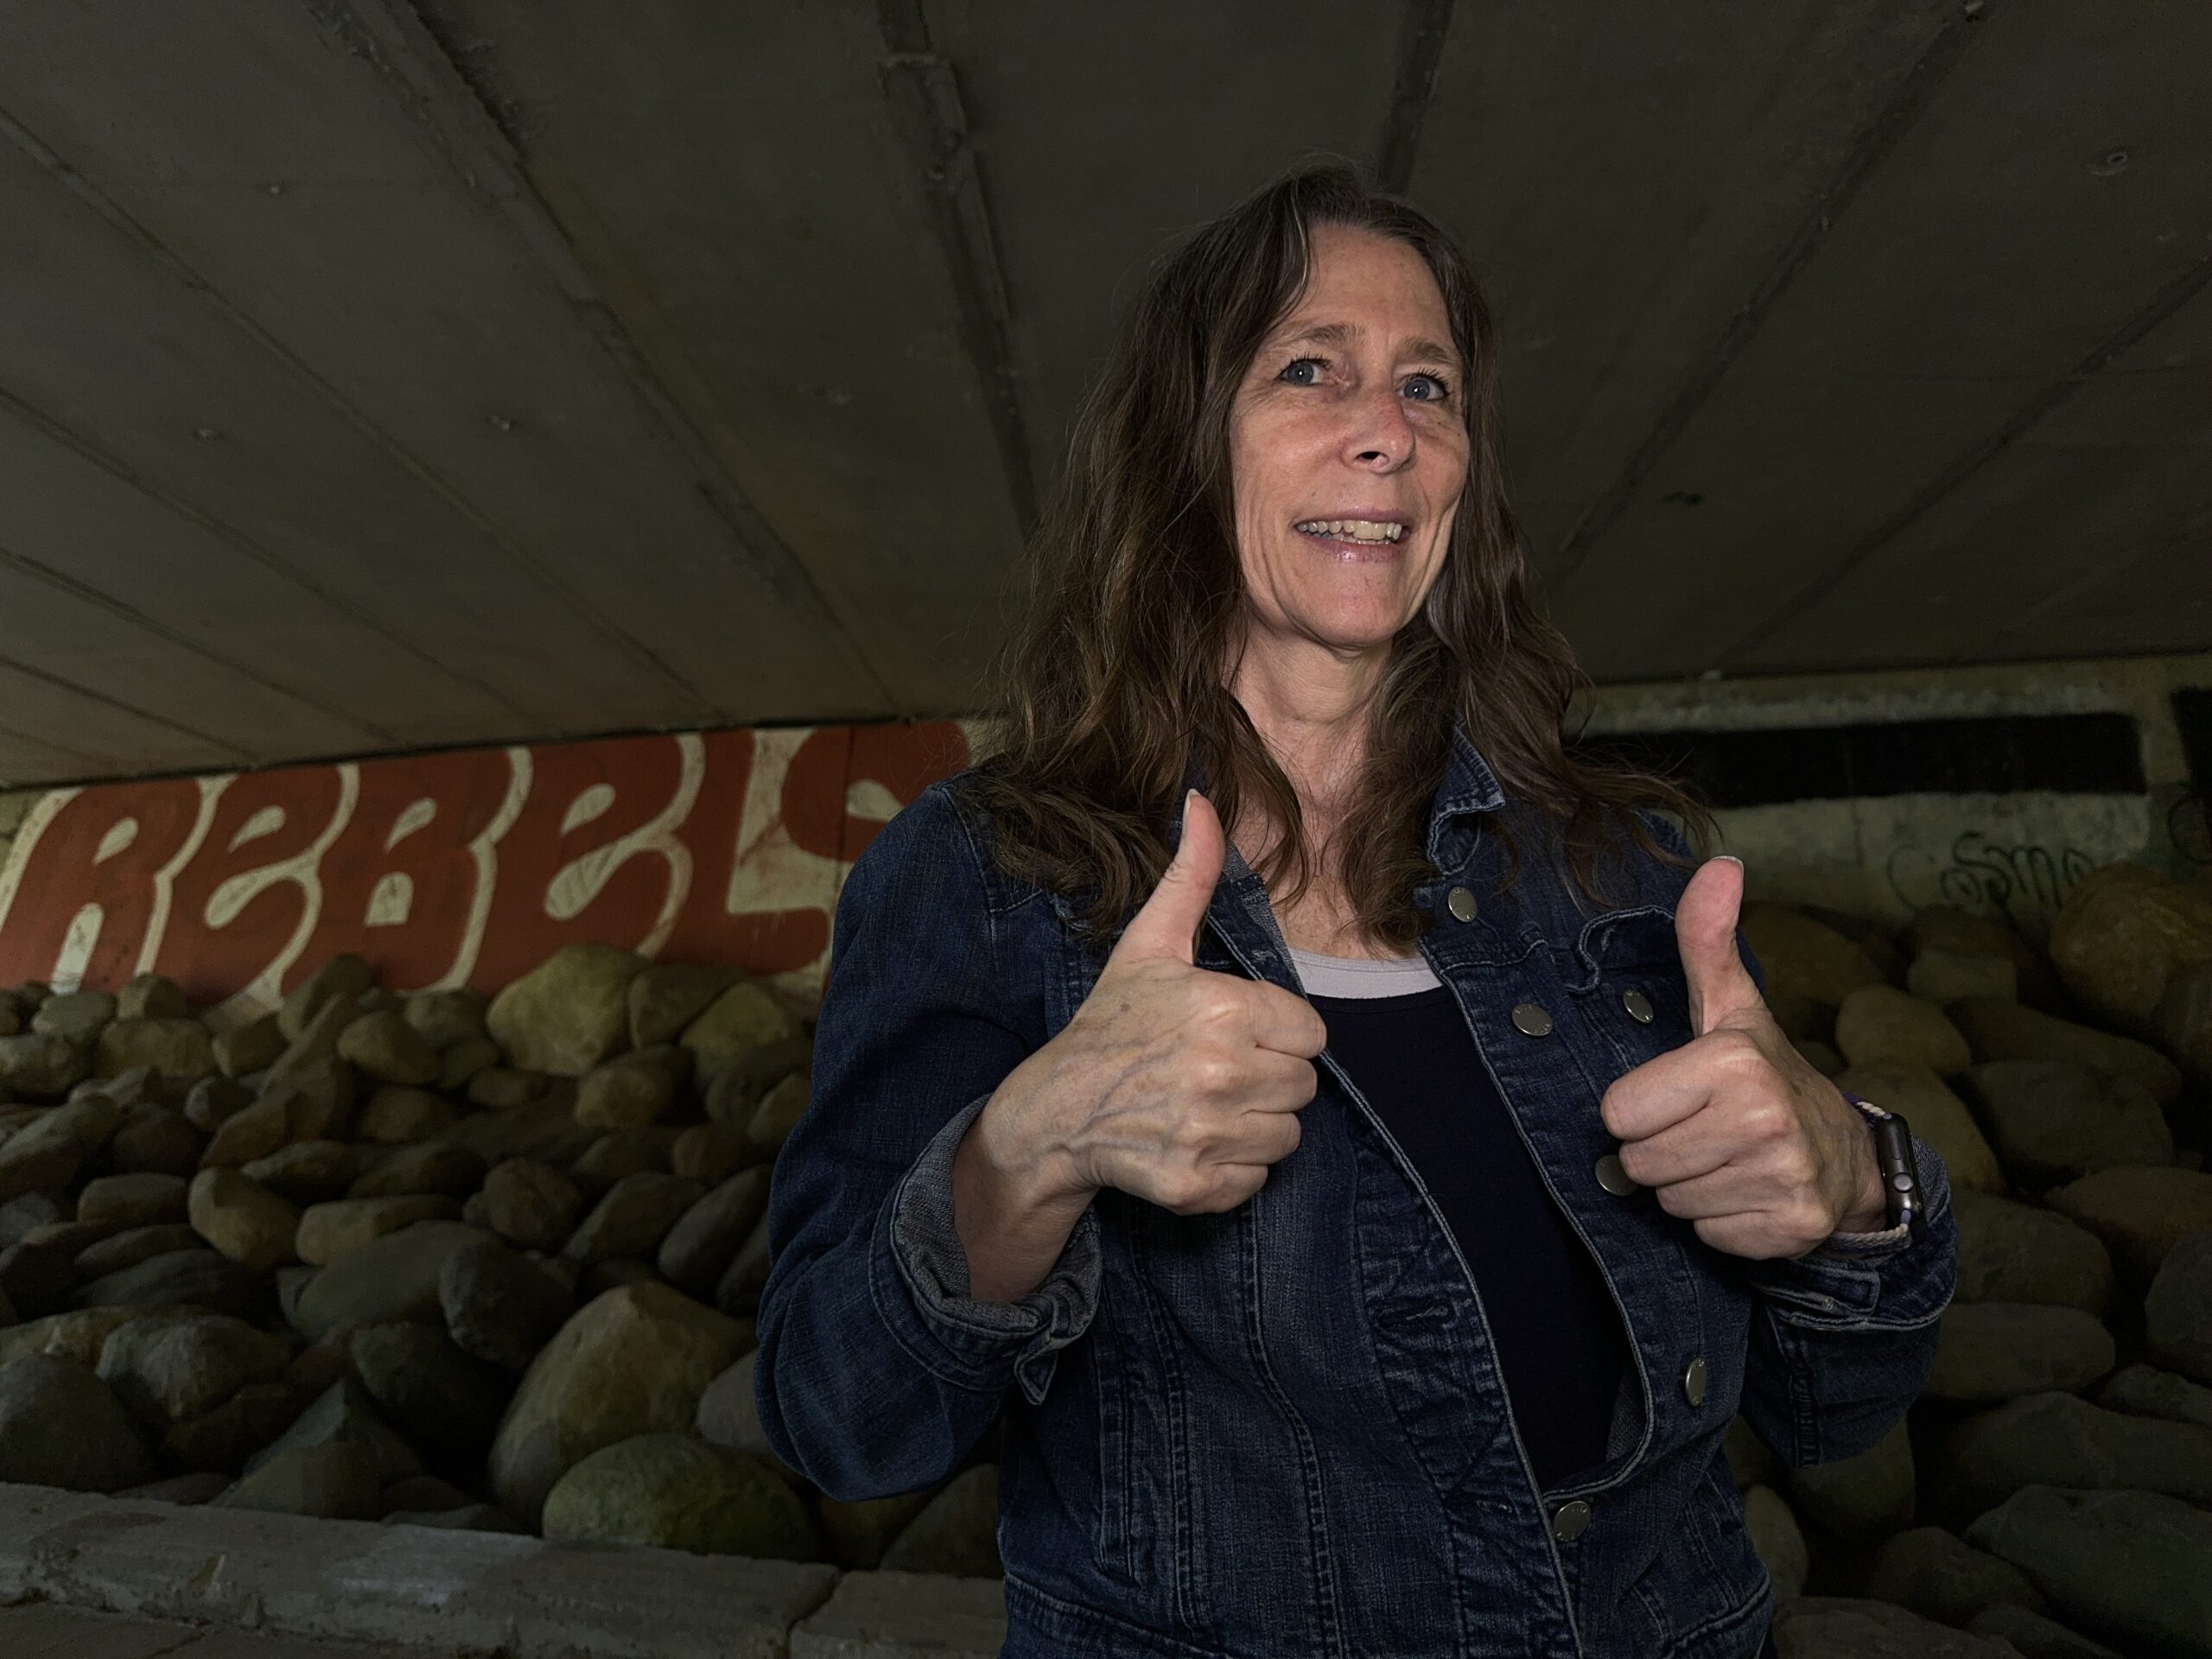
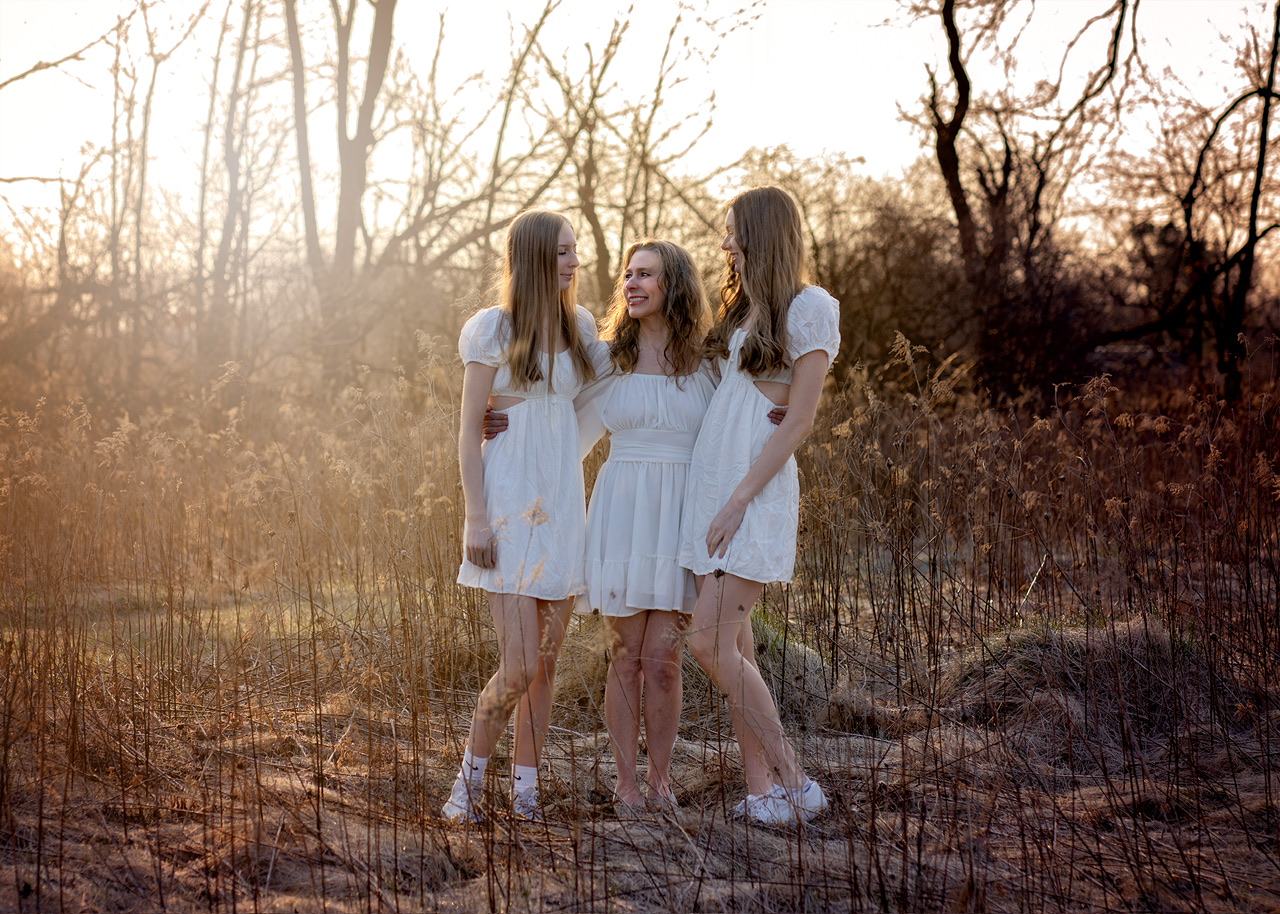
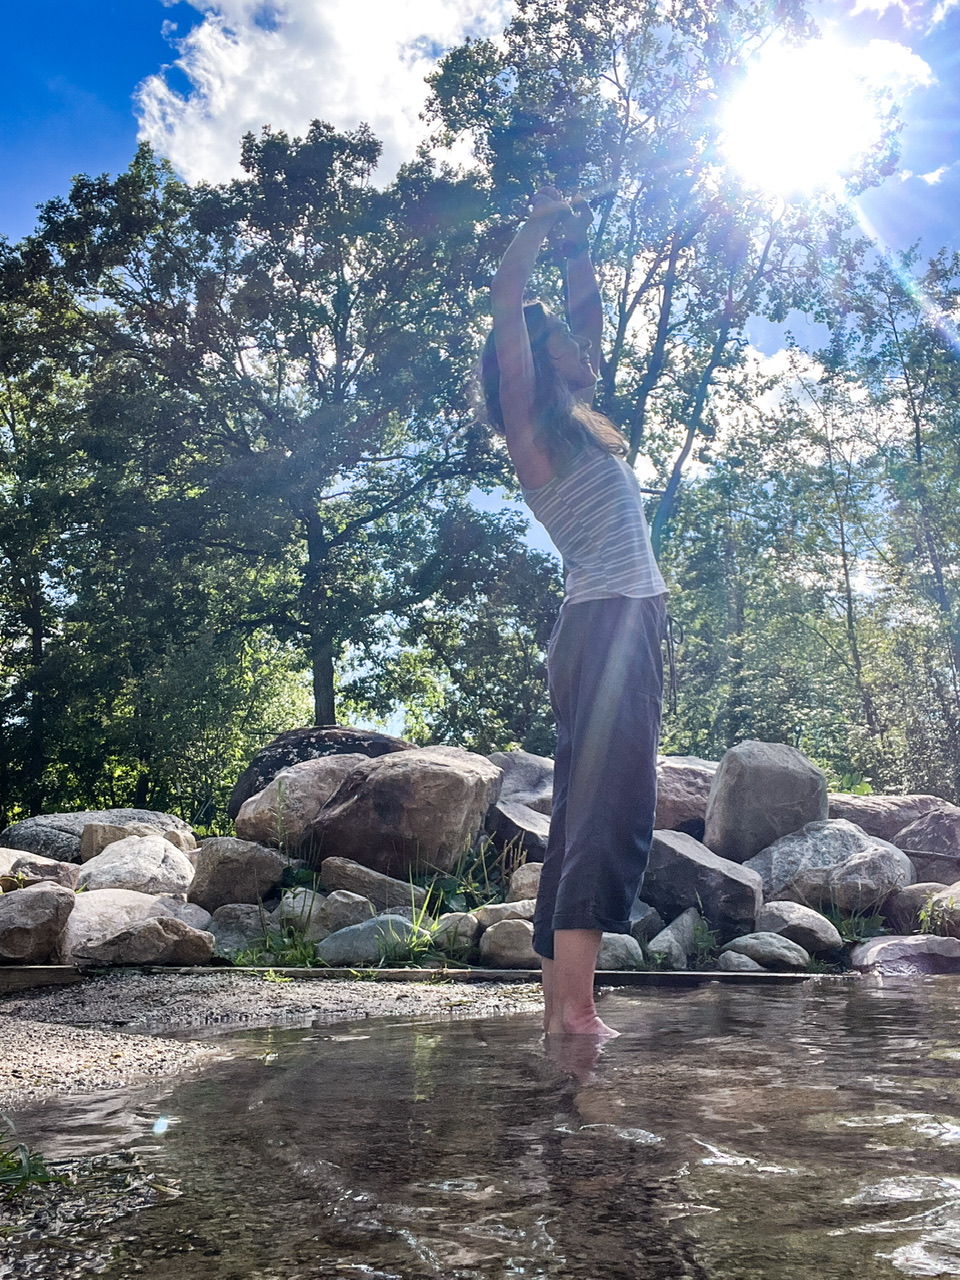
In this example the lighting is in the back left. The sky is a bit too light, but I like how the background colors, light around our hair and rays on the left shows that it’s sunset.
Or….intentionally make a silhouette which will enhance the background but still show your subject in a creative way. Amazing for Story Telling images!
In the below example I love the way it doesn’t just show the sunrise and seagull silhouette, but also outlines the fog, the falls and a portion of the city under the bird. (And an example of how I followed the “pay attention to light” tip!)

3. Use a Reflector
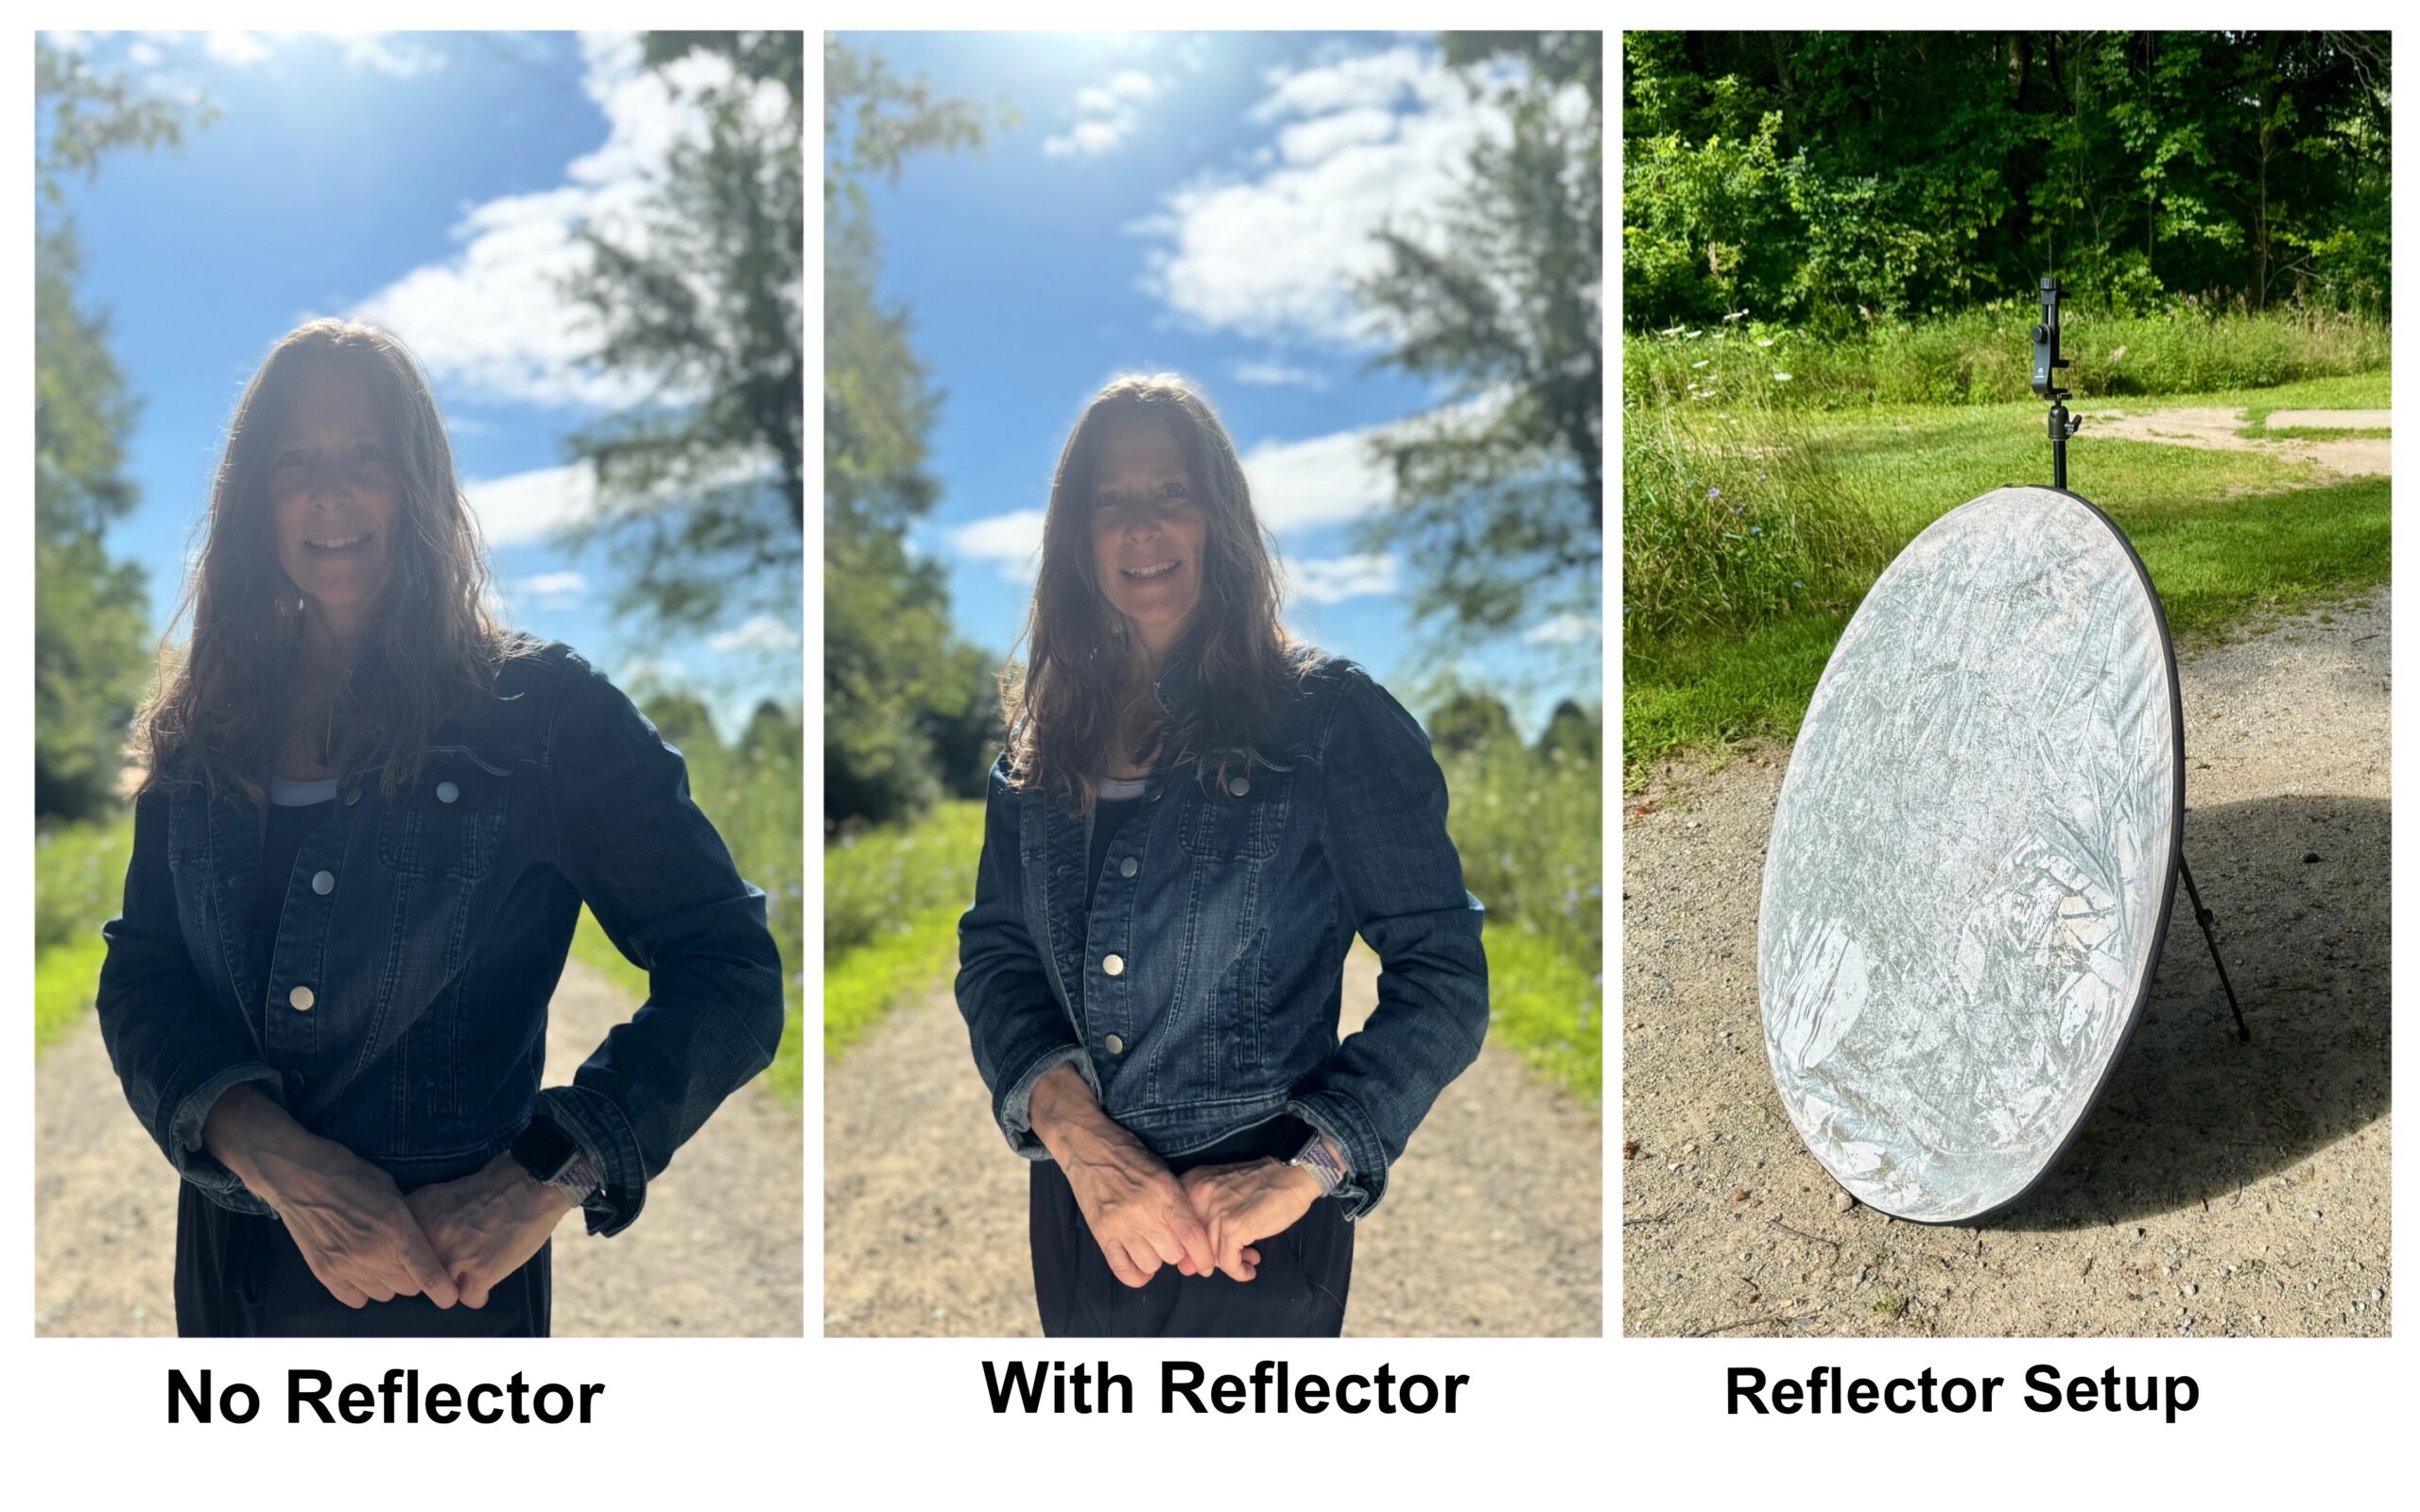
What if you have a perfect spot with a perfect background but the light is completely behind your subject and you don’t want a silhouette? Or you just need a little more light on your subject to make them stand out? Depending on the light source and subject, you can try using a reflector.
I know the example below isn’t perfect – I didn’t point the reflector in the right direction (my face LOL). But if you compare the first two images you can see a big difference in my hands (and a small difference in my face). The reflector is what changed that lighting. The before and after are not edited.
4. Use a Flash or Another Light source
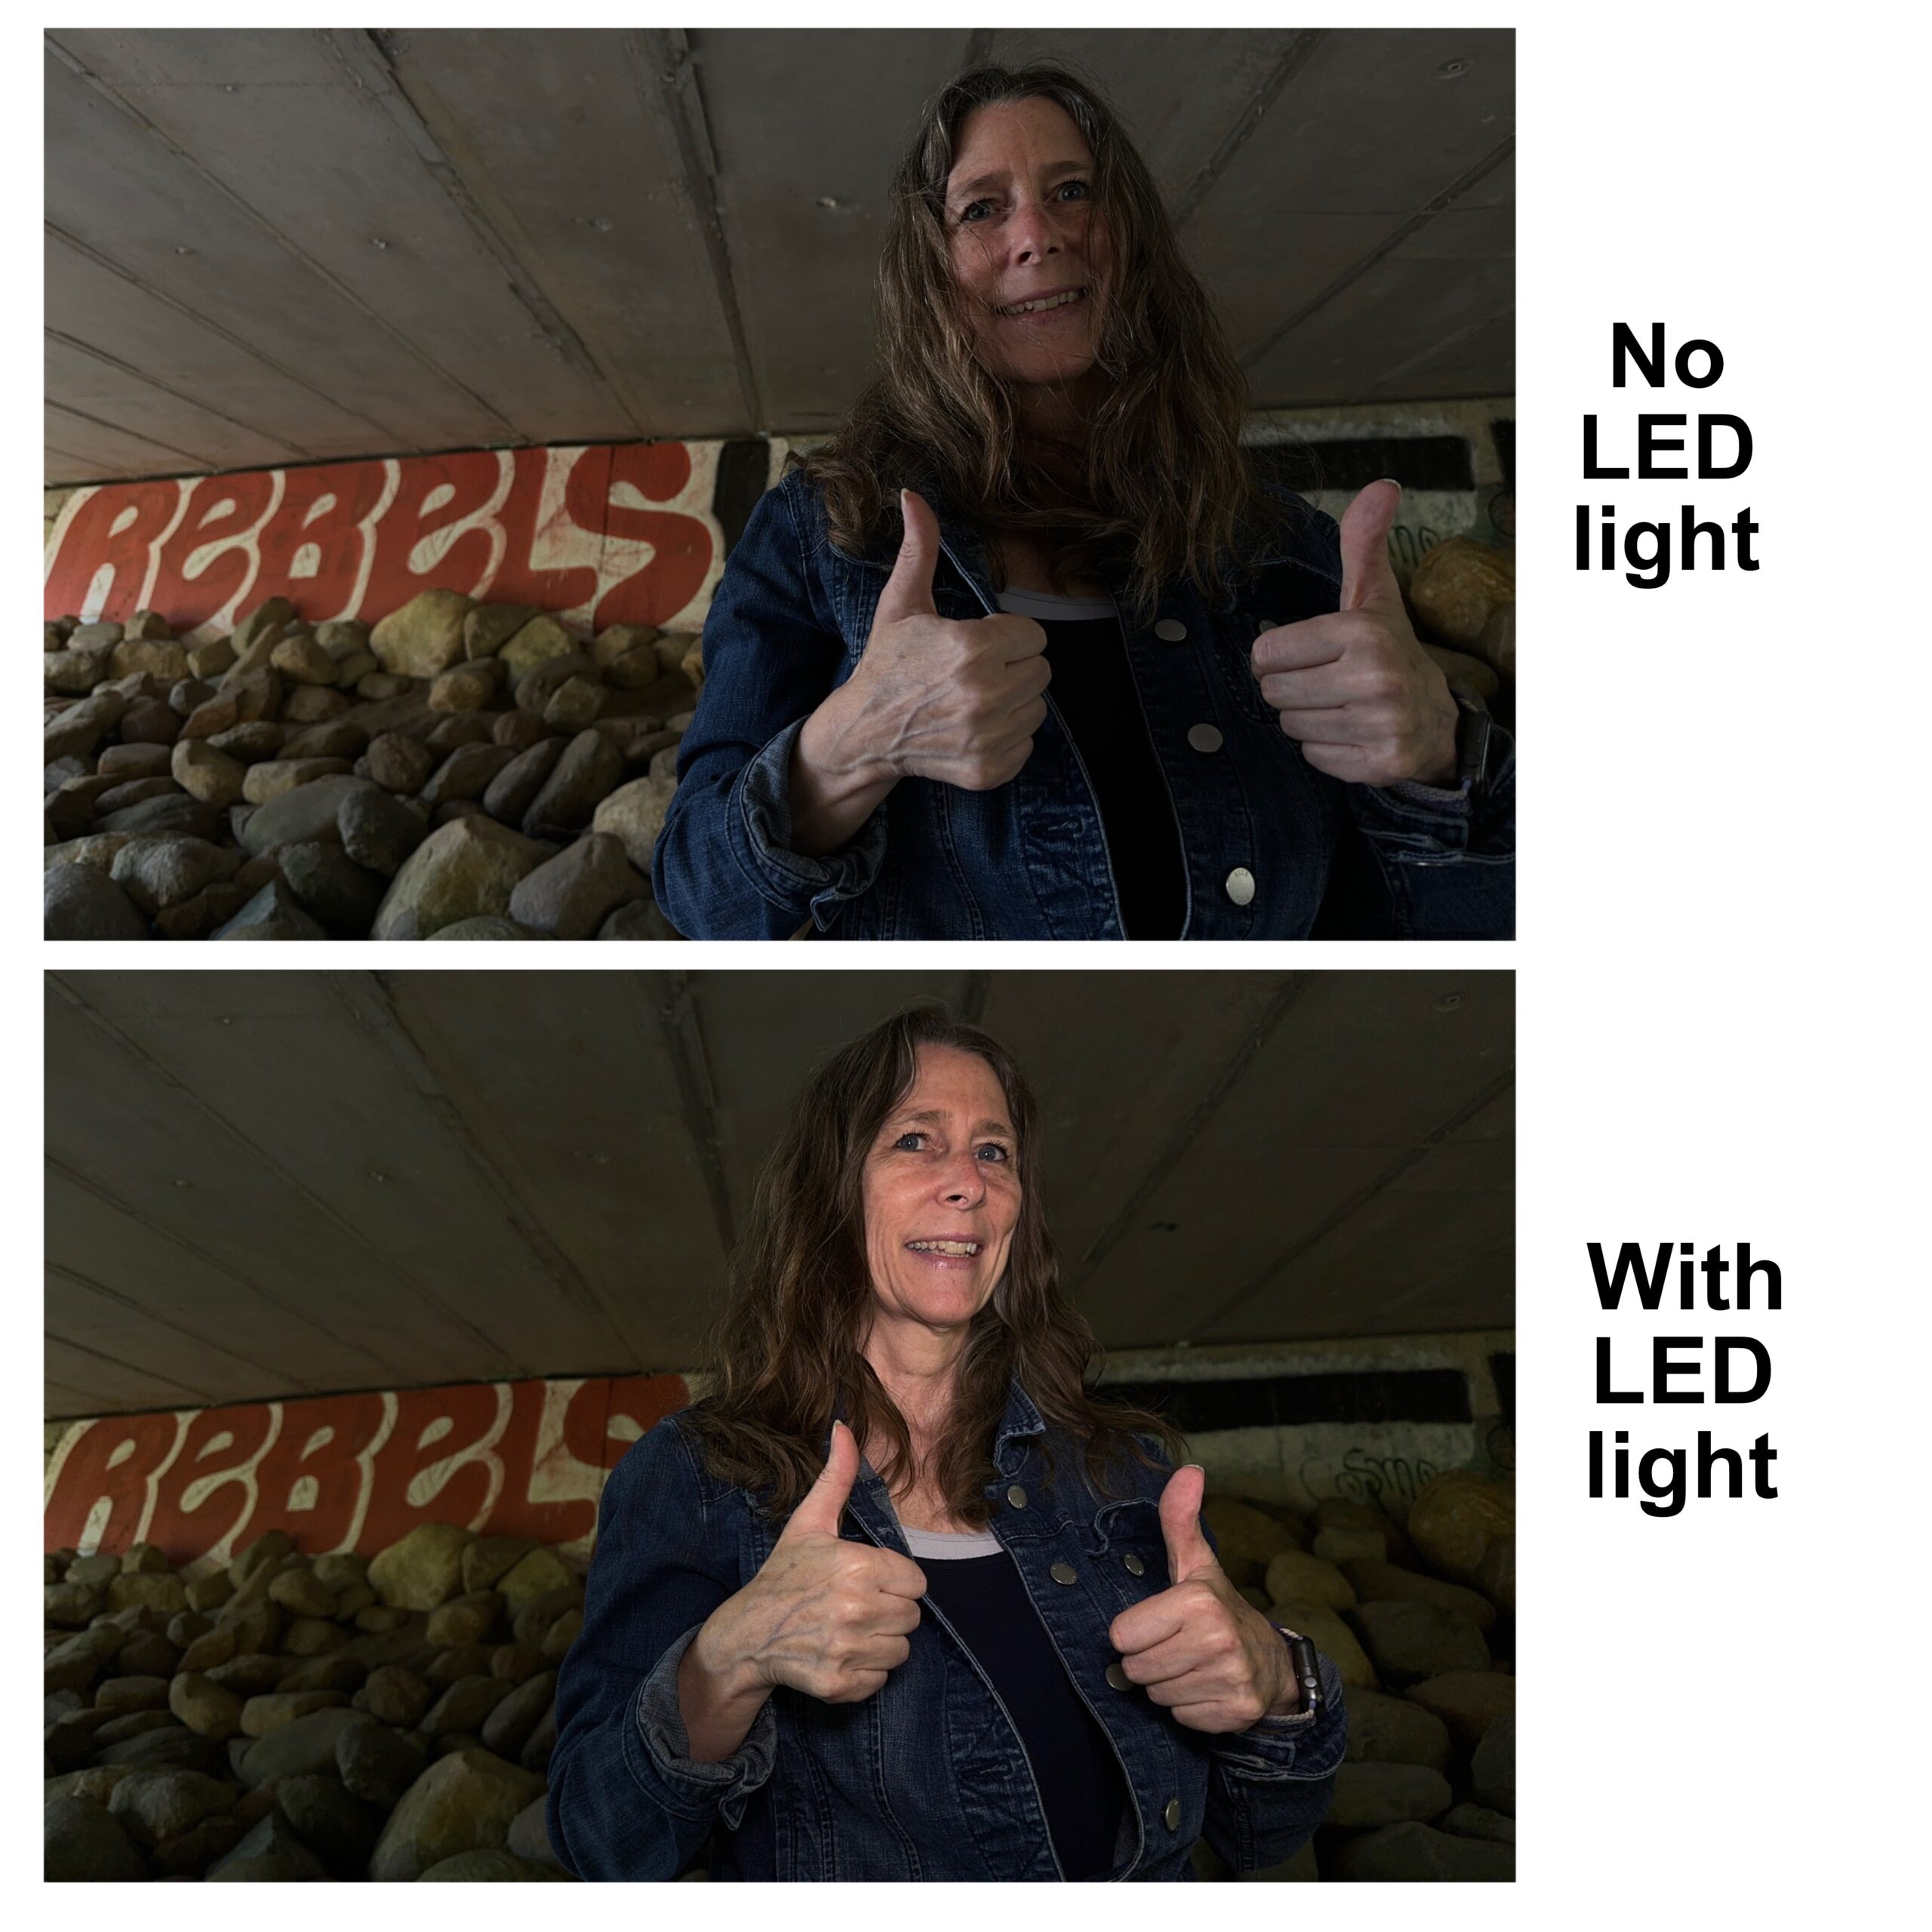
I’m not usually a fan of flash as a light source, as it usually puts too much light on the subject and not in the place were I want it. However I do sometimes use artificial light like ring lights or LED lights.
An LED light is what I used for more light on my face in the second picture below. The light can be added to the top of a camera, on its own tripod or stand, but in this case I added it to the top of my tripod phone holder. Neither of the pics below are edited.
5. Editing
And of course you always have the option of editing after to correct the lighting. You will need to make sure that you set your settings to accommodate the brightest part of your frame. You can correct the low light portion of your frame by changing the shadow or black settings, but this does not work for over lit portions. Note that editing in this manner does sometimes mean that the edited portion may have a lower image quality, so you may want to try one or more of the above options first.
Below is an example of a selfie I took at Hudson Mills Metro Park that I had to edit because I was to dark in the image. Do I still love the image? Yes. Is the image quality great? No.
Which Method Should you use?
How do you determine what method to use to pay attention to light? And whether to point your subject toward the light, or put the light behind your subject? There is no one size fits all answer – it all depends on what you want people to see in your image, or what story you want to tell.
If you aren’t sure, try several methods until you get what you are looking for. Practice makes perfect!
What are some roadblocks you ran into with lighting, and how did you resolve them? Let me know in the comments!